Falling for Foreshortening from the 2011-2012 School Year
The summer between 4th and 5th grade is a large psychological change for most of my students. They become perfectionists who, if they can't create exactly what they see in their mind, become extremely frustrated. This frustration can ultimately become a hatred for art. As an art instructor, as well as a lover of art, I want to avoid this frustration for the students as much as possible in order to instill a love of creativity and an appreciation of art.
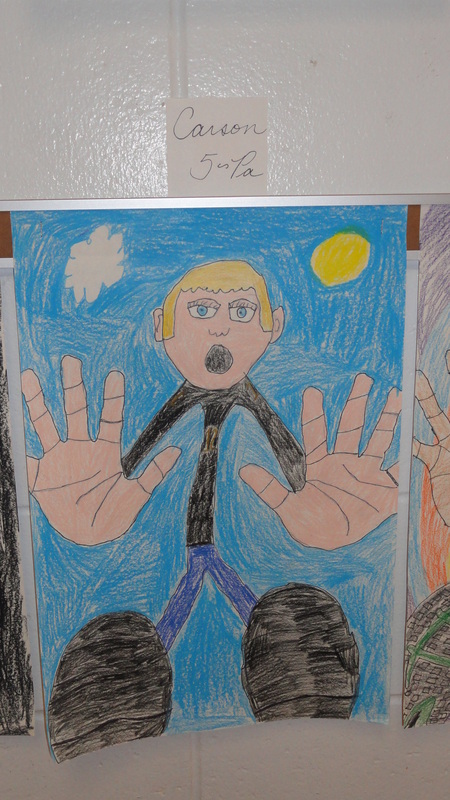
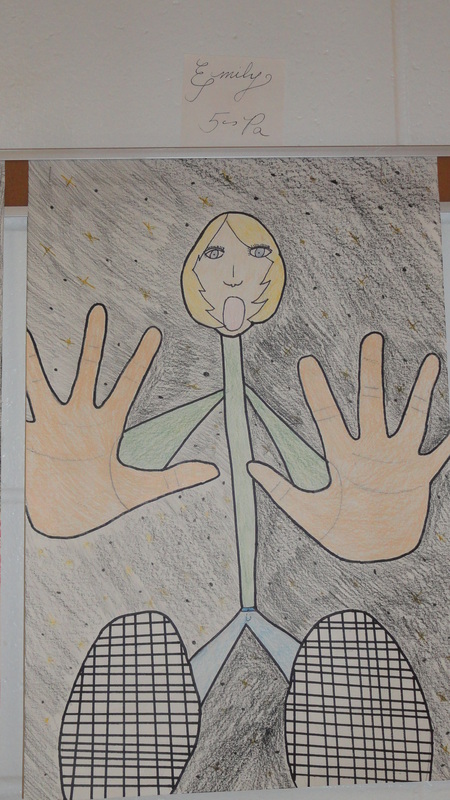
To this end, I decided to change the usual beginning of the year self-portrait to a less pressure, more cartoonish, more fun project. I originally discovered this project on Mrs. Brown’s art project pages, which you can find here. We did change it a little from Mrs. Brown’s instructions because I still wanted to be able to see the kid’s drawing of faces filled with surprise as they caught themselves from falling, especially since this project was supposed to be a self-portrait. In order to meet this goal, we needed to have our feet half off of the paper as well as part of our hands.
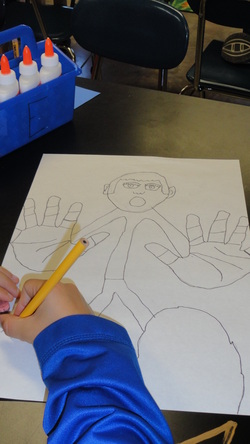
DAY ONE: We talk about foreshortening and what that means to a piece of art. Are things that are close to you bigger or smaller than the things in the distance? Of course, things that are closer to the viewer are larger, so the hands and feet of our cartoon selves need to be much larger than the rubbery looking bodies will be. Trace your hands and feet to begin this project.
DAY TWO: If you ever want a group of fifth graders to giggle insanely, just say either of the following words out loud: arm pits or crotch. Sadly, I am required by the subject matter of this project to say both...numerous times. SIGH. Sadly, there is no way (that I can think of, anyway) to explain how to draw arms and legs from the earlier traced hands and feet. draw your head above your arms, being careful not to draw a pinhead (too small) nor a grapefuit head (too big).
DAY THREE: Out come the permanent markers to trace the pencil lines we want to keep. Then I insist that they use colored pencils to become more familar with how you can shade and color with them. Trace, erase, and color!
DAY FOUR: We talk about backgrounds and the point of view of the person looking at the completed artwork. Since we are looking up through a glass floor, we wouldn't be able to see grass. I ask the kids to use outer space, the sky, or a ceiling tile pattern behind themselves. Other ideas are generally approved of, just so they ask and we can discuss it first. The final product is worth all the giggles that I had at the start of this project!
To this end, I decided to change the usual beginning of the year self-portrait to a less pressure, more cartoonish, more fun project. I originally discovered this project on Mrs. Brown’s art project pages, which you can find here. We did change it a little from Mrs. Brown’s instructions because I still wanted to be able to see the kid’s drawing of faces filled with surprise as they caught themselves from falling, especially since this project was supposed to be a self-portrait. In order to meet this goal, we needed to have our feet half off of the paper as well as part of our hands.
DAY ONE: We talk about foreshortening and what that means to a piece of art. Are things that are close to you bigger or smaller than the things in the distance? Of course, things that are closer to the viewer are larger, so the hands and feet of our cartoon selves need to be much larger than the rubbery looking bodies will be. Trace your hands and feet to begin this project.
DAY TWO: If you ever want a group of fifth graders to giggle insanely, just say either of the following words out loud: arm pits or crotch. Sadly, I am required by the subject matter of this project to say both...numerous times. SIGH. Sadly, there is no way (that I can think of, anyway) to explain how to draw arms and legs from the earlier traced hands and feet. draw your head above your arms, being careful not to draw a pinhead (too small) nor a grapefuit head (too big).
DAY THREE: Out come the permanent markers to trace the pencil lines we want to keep. Then I insist that they use colored pencils to become more familar with how you can shade and color with them. Trace, erase, and color!
DAY FOUR: We talk about backgrounds and the point of view of the person looking at the completed artwork. Since we are looking up through a glass floor, we wouldn't be able to see grass. I ask the kids to use outer space, the sky, or a ceiling tile pattern behind themselves. Other ideas are generally approved of, just so they ask and we can discuss it first. The final product is worth all the giggles that I had at the start of this project!
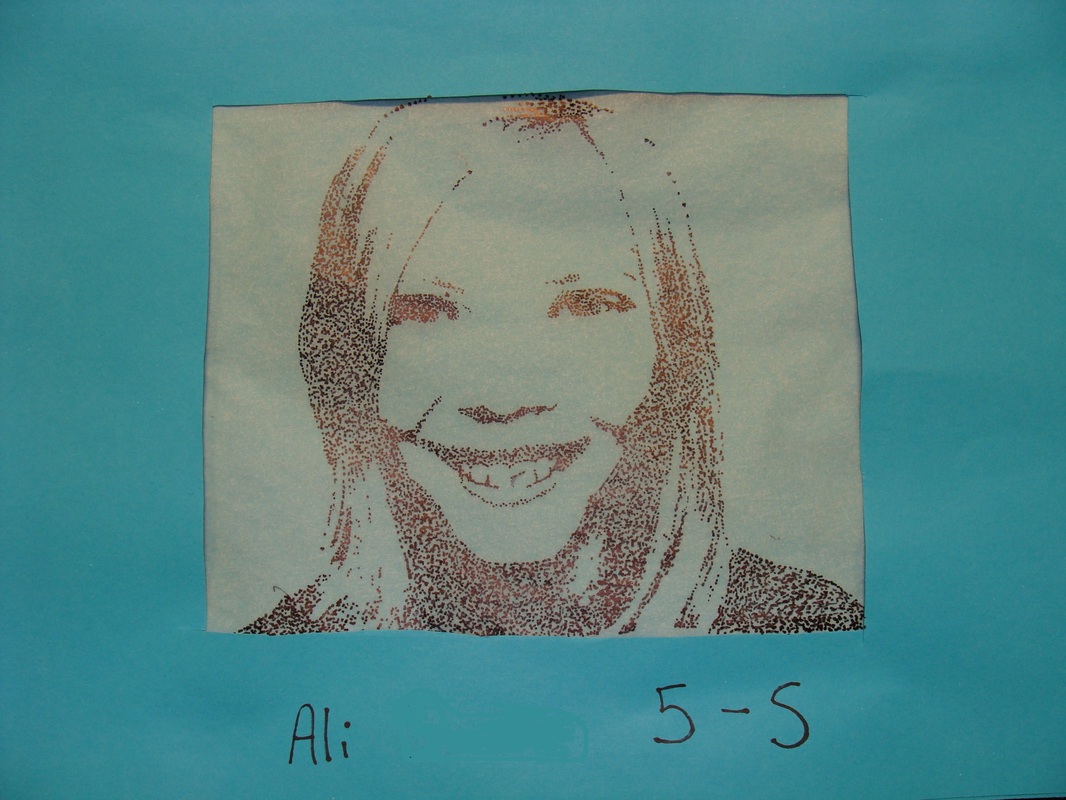
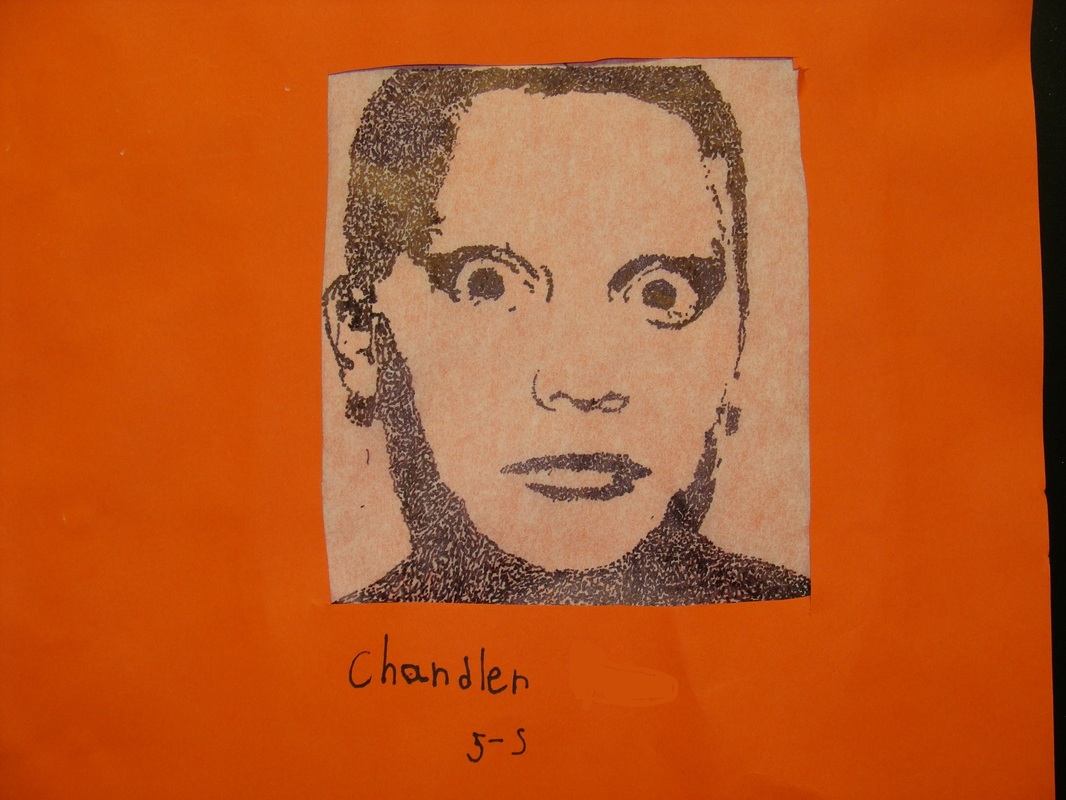
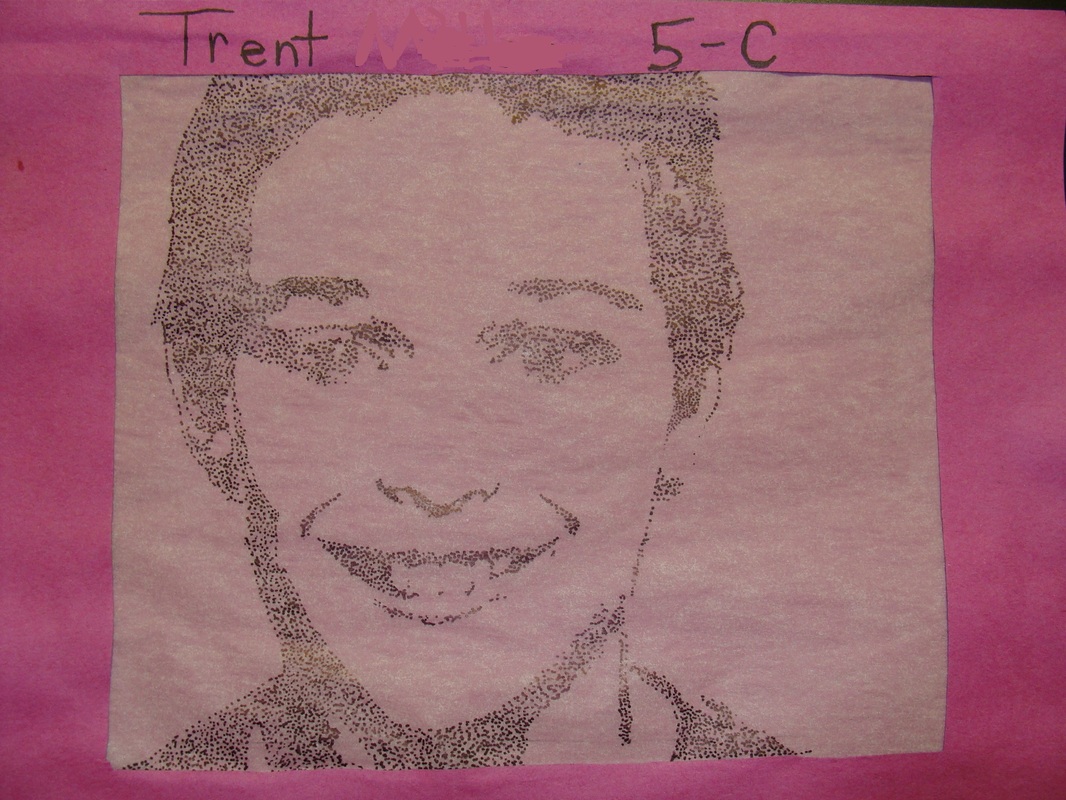
Ben Day Dots and Lichenstein from 2010-2011 School Year
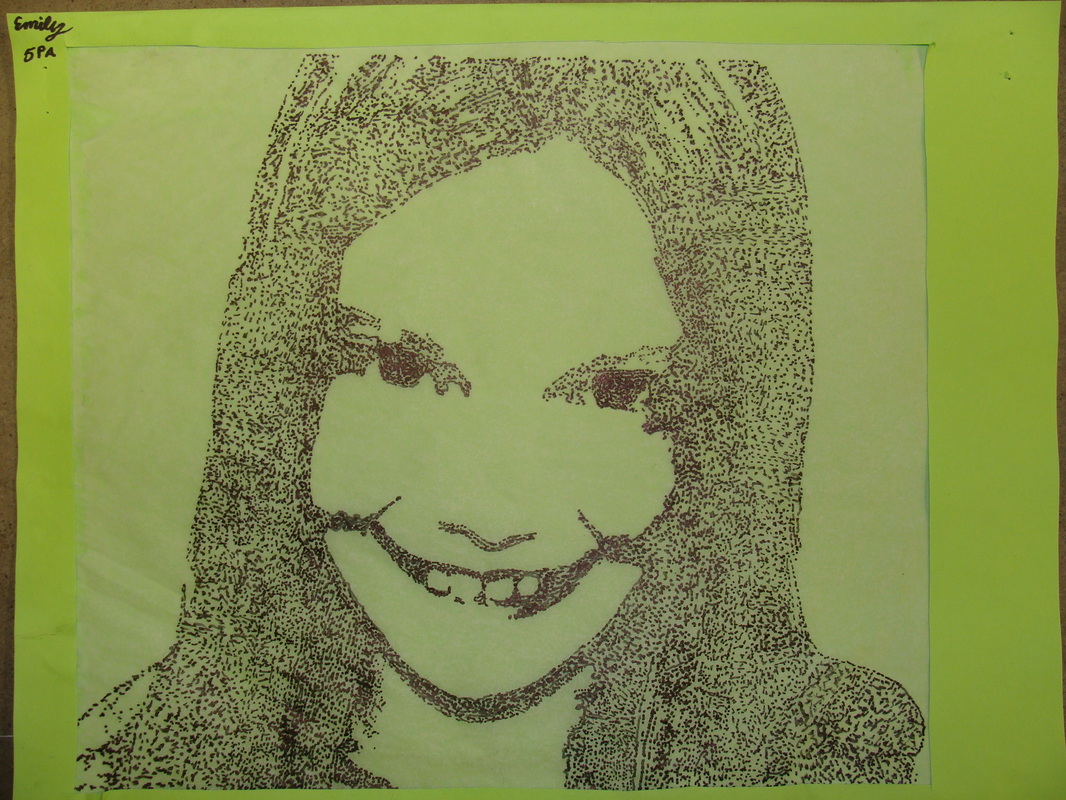
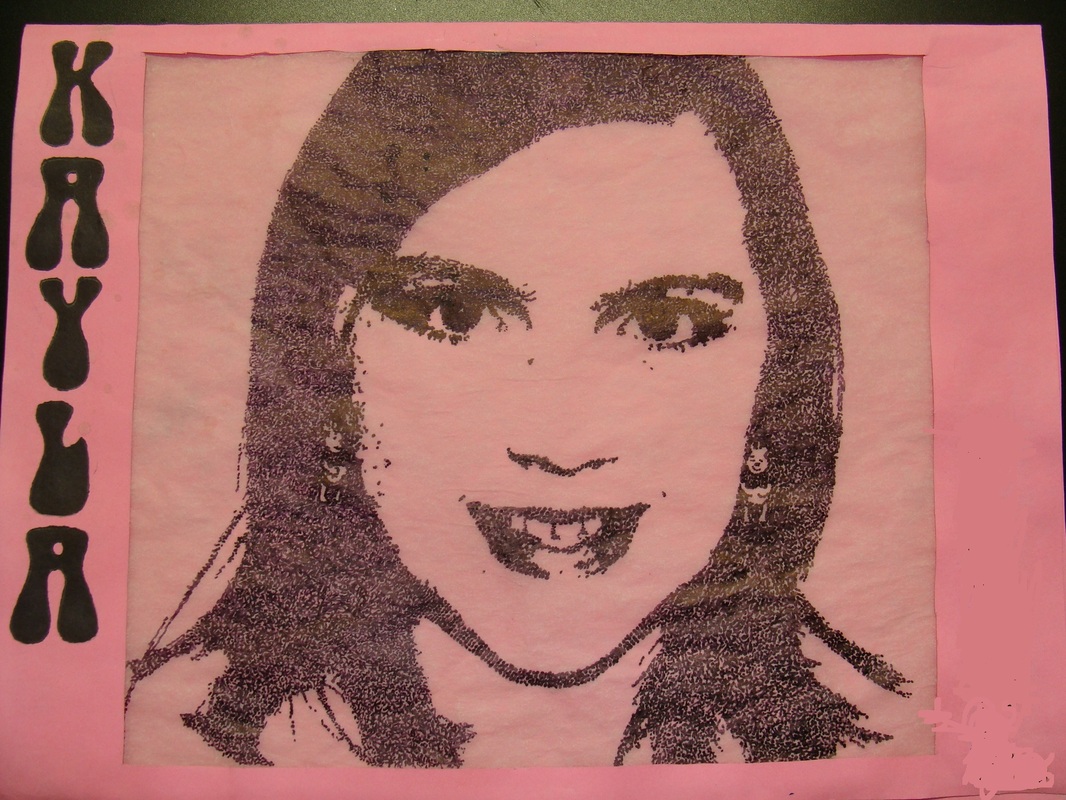
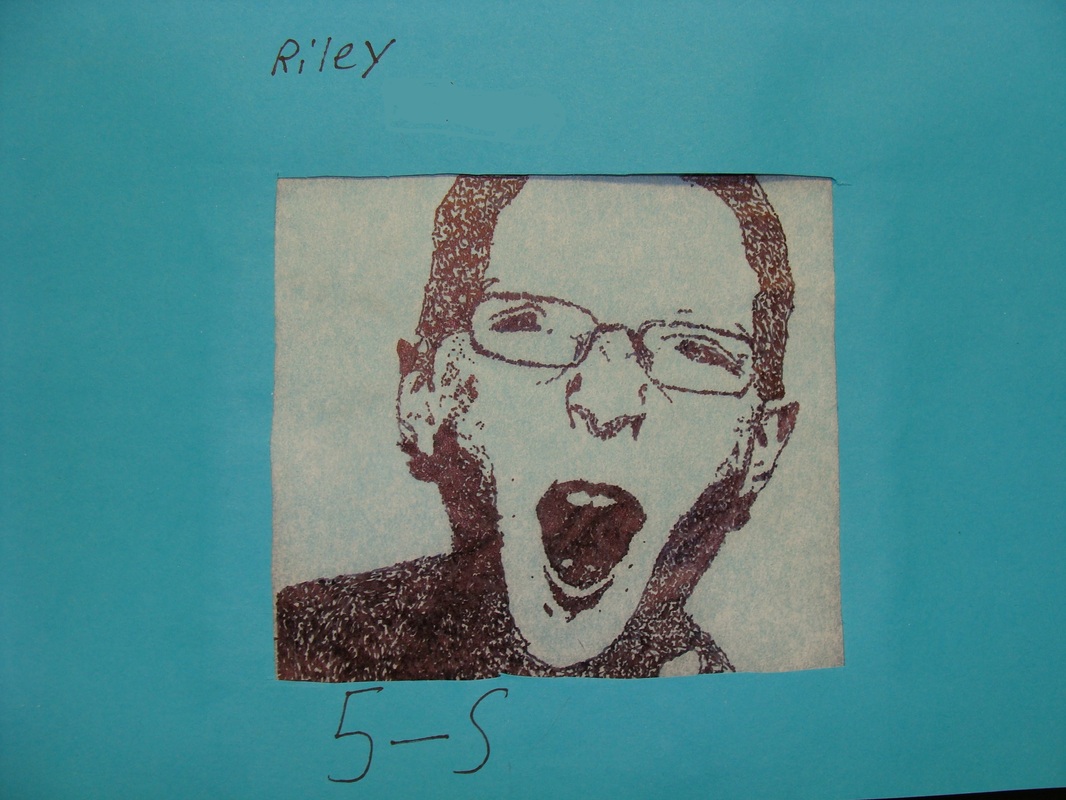
Yes, it is true! Your eyes do not deceive you! These self-portraits are actually many, many dots!
Pop Art Exploration from the 2010-2011 School Year
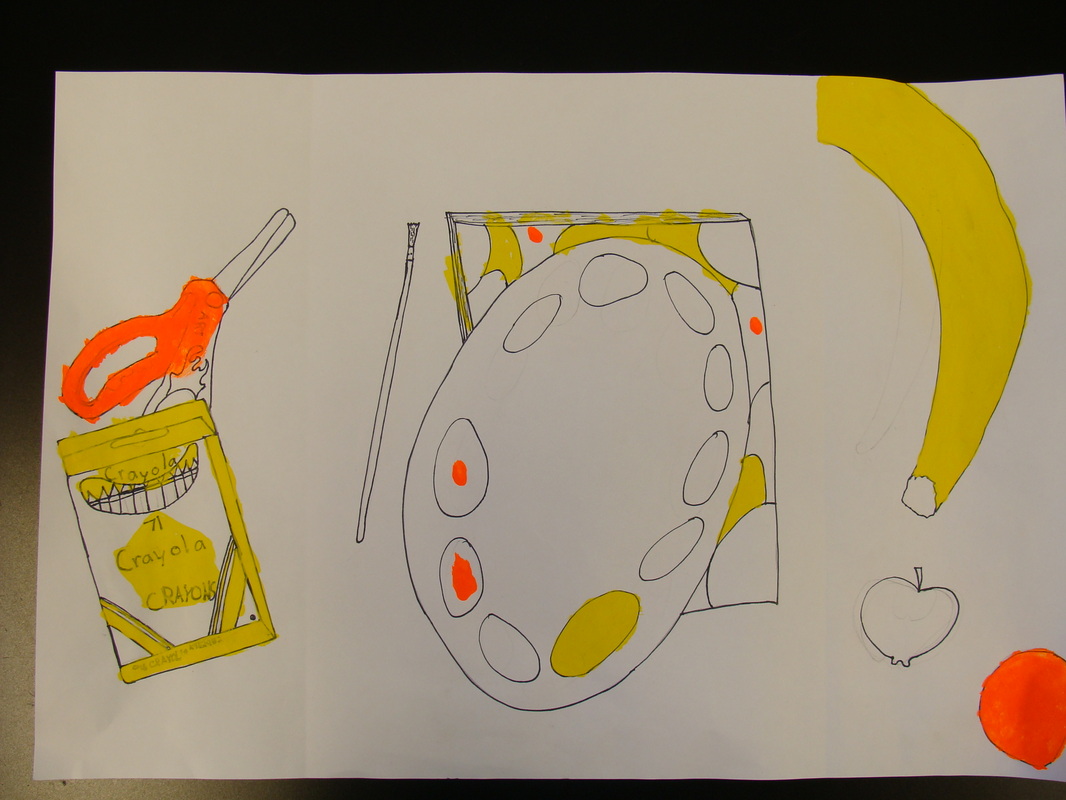
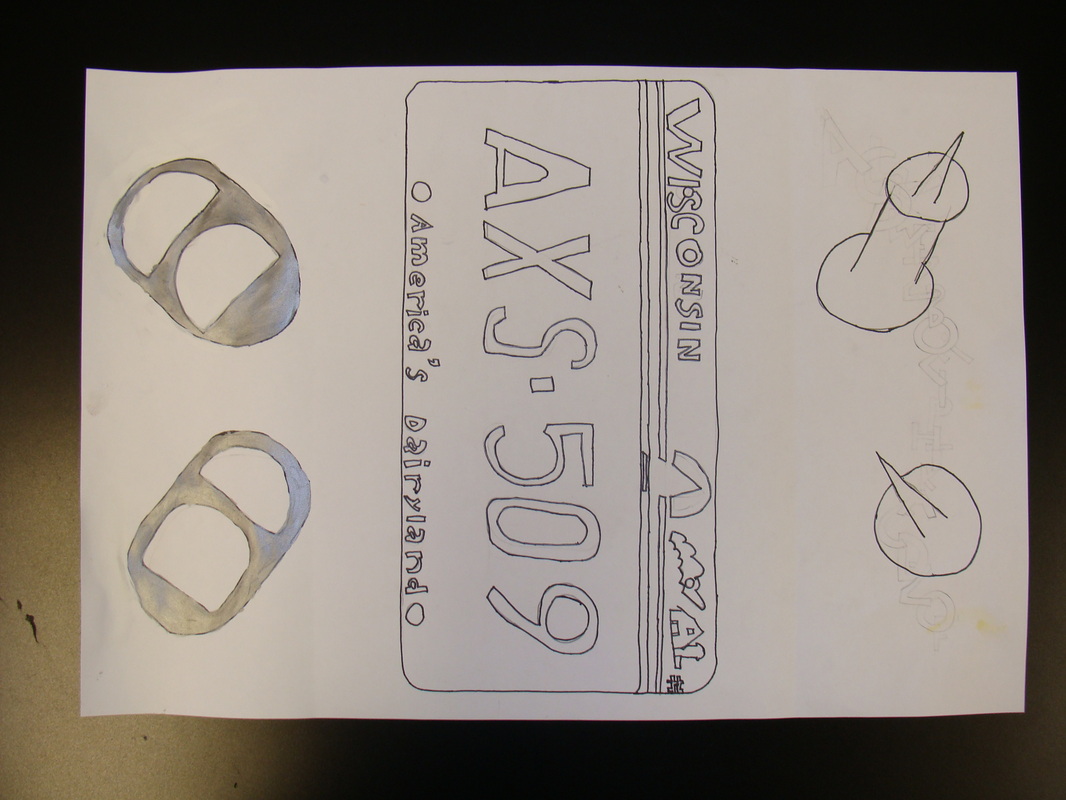
The students are introduced to the idea that every day, POPular objects can become art by watching a movie about Andy Warhol and his Factory. I then have them fold their paper into three sections by folding the two outside edges of the paper to the middle. They then have the option to draw different items or one item from three different view points starting off using a pencil.
DAYS TWO to FOUR: Students trace their drawings using permanent marker. Then come the options of painting the item exactly as you could find it in a store or use mega bright florencent 80's colors and go wild!
DAYS TWO to FOUR: Students trace their drawings using permanent marker. Then come the options of painting the item exactly as you could find it in a store or use mega bright florencent 80's colors and go wild!