To view grades K to 3, please go to amherstart.weebly.com
Sixth Grade Is the Start of Middle School
I decided that my middle school students should have a web page that is completely different from the elementary school's pages; especially since the start of middle school is such a transition towards independence when compared to the elementary school experience of staying in lines as a class whenever you go into the halls. Sixth grade has passing time between classes, lockers and all different teachers for different subjects. For these reasons this page has a look all its own. The sixth grade curriculum is more of an exploratory experience for the student which is different as well. There are only four major projects because I only see each group four times during the year.
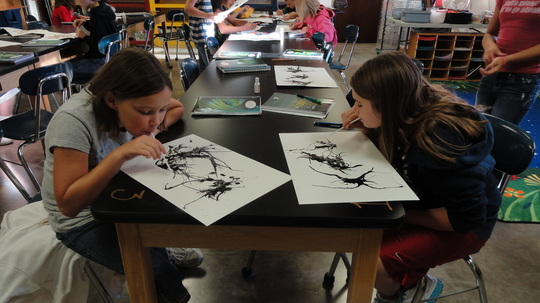
Using straws to blow India ink around the page to create a monster.
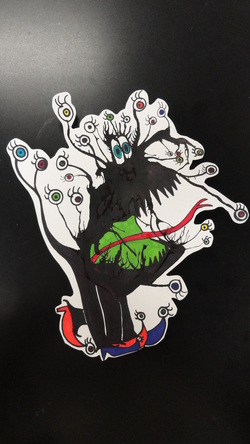
This is my example monster marching around.
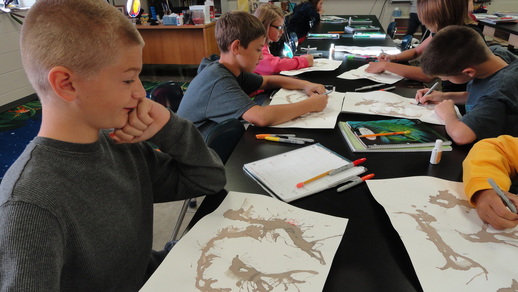
Starting to add details to monsterous blots using permanent markers and white out.
Ink Blot Monsters
The first project that we tackle as new, mature 6th graders are ink blot monsters. This project was inspired by a book that I found the summer of 2008 entitled 100 Days of Monsters by Stefan G. Bucher
(ISBN-13: 978-1-60061-091-2).
Mr. Bucher is an artist who created a monster a day using ink blots and adding details using permanent markers. He then posted each monster on a blog and people e-mailed stories that the monster of the day inspired to him.
For our purposes, we write our own stories for our own monsters. I request that the kids create two to three monsters and then they can pick their favorite to cut out, give a background to and write the story about. I tell them that the goal of writing the story is to make me laugh out loud as I read it. The kids are VERY successful in that.
DAY ONE: I explain what the project is and show them some of Stefan Bucher's creatures. To start this project we use India ink. I emphasize that India ink is a permanent stain on clothes, the floor or the table and a long term stain on skin. Each student gets a straw to blow the ink into whatever desired shape the artist is able to create by blowing the ink around the paper. The papers are then put into the rack to dry.
DAY TWO to DAY FIVE: I demonstrate how to look at the inky blob and imagine what it could possibly morph into, turning the paper in all different directions. Then we dive right in using permanent markers to add teeth, eyes, clothes, tongues, wings, arms, legs, whatever! The sky is the limit!
DAY SIX: We travel to the computer lab to type out our stories.
DAY SEVEN & EIGHT: Background paper is chosen from my storeroom and the story and the monster share the space. The completed monsters are so whimsical! My sixth graders make me very proud of their creativity! Great job.
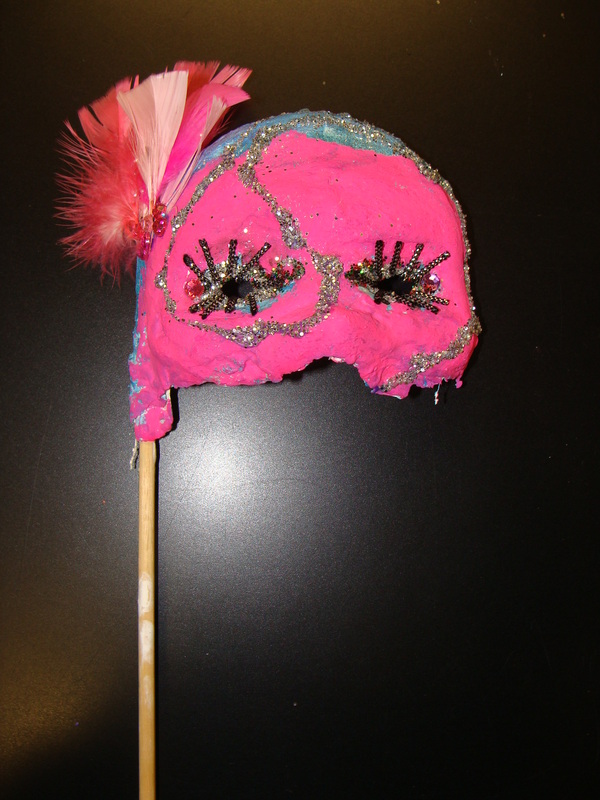
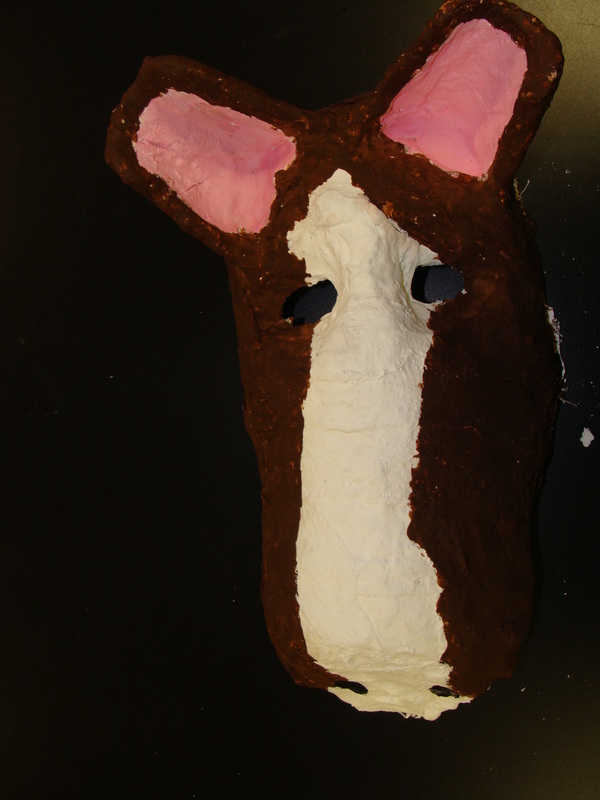
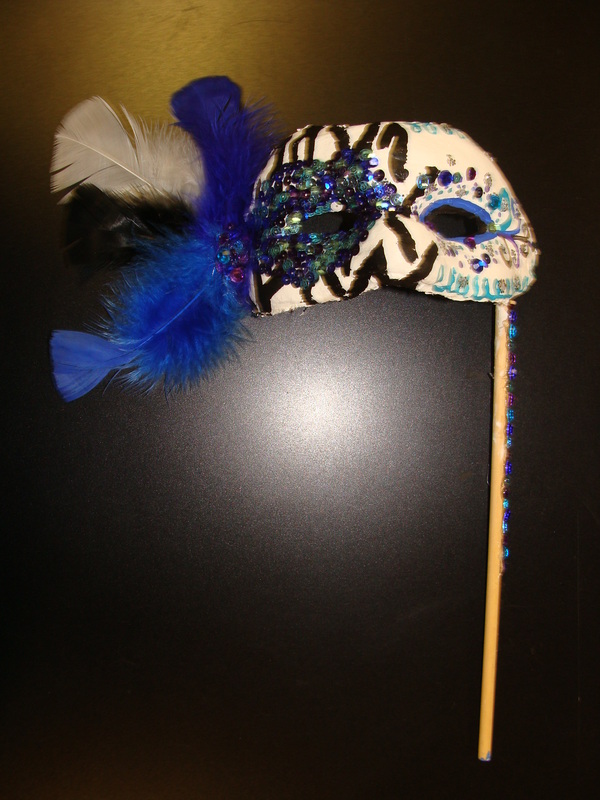
Plaster Craft Mask Making
This may be the most looked forward to project for the kids. I started doing masks the first year that I taught and it has definitely caught on. I have had kids in fourth grade tell me about the mask that they plan on creating when they get to sixth grade. That's quite a bit of anticipation and excitement!
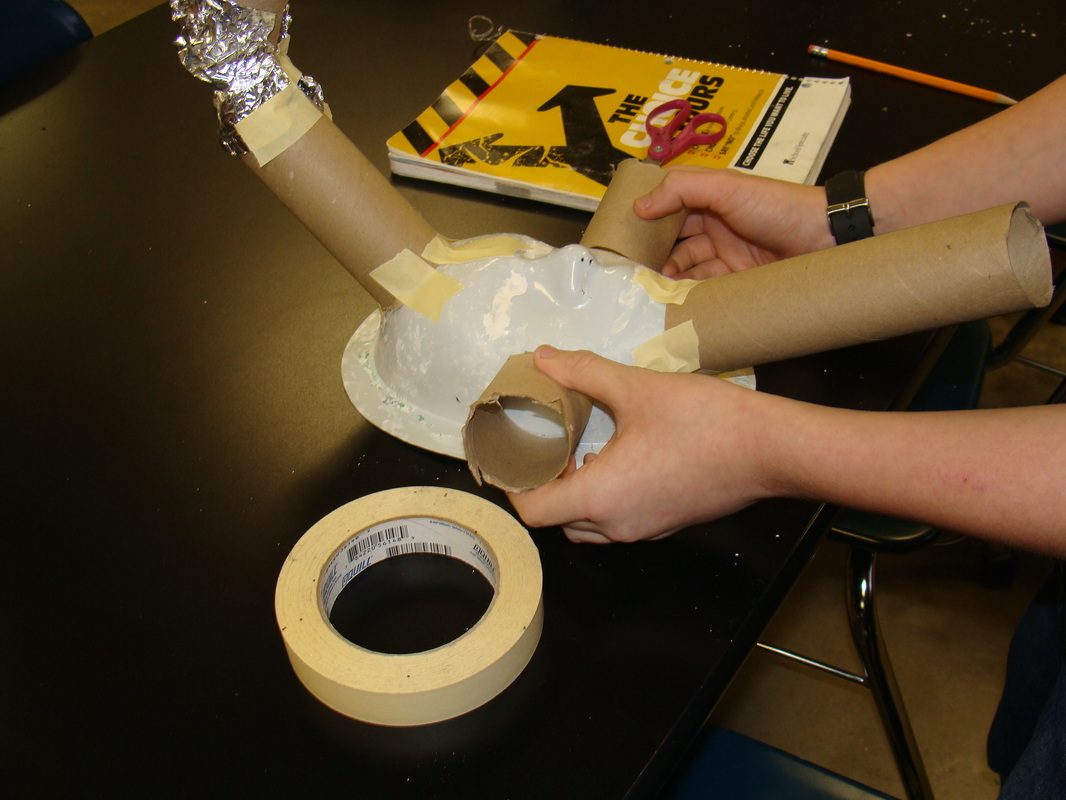
DAY ONE: We watch the movie entitled Masks from Many Cultures from Crystal Video. I encourage the kids to make sketches of their ideas or masks that they see that they like. Once they have drawn out the mask that they intend to create, we talk about sculpture and what kinds of things they will need to support the plaster. The sculpture's supportive structure or skeleton is called an armature.
DAY TWO: Students have the choice to use a plastic face mold or their own face as the base form for their mask. If they choose to use their own face, day two consists of perfecting their preliminary drawing and gathering decorations to use after the mask has been cast. If they chose to use the plastic face mold, it is their day two job to perfect the armature. It is very important to have the armature strong enough to hold up the wet plaster and not fall apart.
DAY THREE: Plaster day! Once the plaster is dry, you can't add anything else to it, so the designs needs to be completed in one frantic art session. Once the basic shape appears on the masks, we then need to add 3-4 layers to make sure the plaster isn't too delicate. Once these steps are complete, it sits over night to dry.
DAY FOUR: Paint day! The first step to a beautiful mask is to paint.
DAYS FIVE to TEN: Paint days continue as well as decorating the mask using whatever odds and ends they can find in the art room as well as anything they may choose to bring from home. Just about anything is fair game.
Masks from the 2010-2011 school year.